Making colorful craft resin coasters is fun!
While some of you might be a fan of making geode resin coasters or, agate arts with glitters, some others like to play around with dried pressed flowers, leaves, petals, and other sorts of creative craft ideas.
Whatever the idea you have in mind, just ensure you pick the best resin for coasters. You might be able to create coasters using some ordinary resins, but when it comes to durability and heat resistance, they’ll just fail!
With that in mind, let’s see how is epoxy resin used for coaster making? And, this will be a complete guide, very much helpful, especially for those DIY beginners!
Steps of Making Resin Coasters
Based on the type of resin you’ve chosen, you’ll get a certain amount of work time once you mix them. Otherwise, it will get hardened up. So, make sure you’ve gathered all the essential materials before you even start –
Materials you’ll need:
- Epoxy resin (with stir sticks & cups)
- Resin coaster silicone mold
- Epoxy resin color pigment
- Hand gloves
- Resin glitter (if you want to add)
Step 1: Shape Your Idea in Mind
This is the very first and important step that most people would avoid carelessly. And, that is to define the creative idea in your mind first. That’s because based on your design the process might be slightly different.
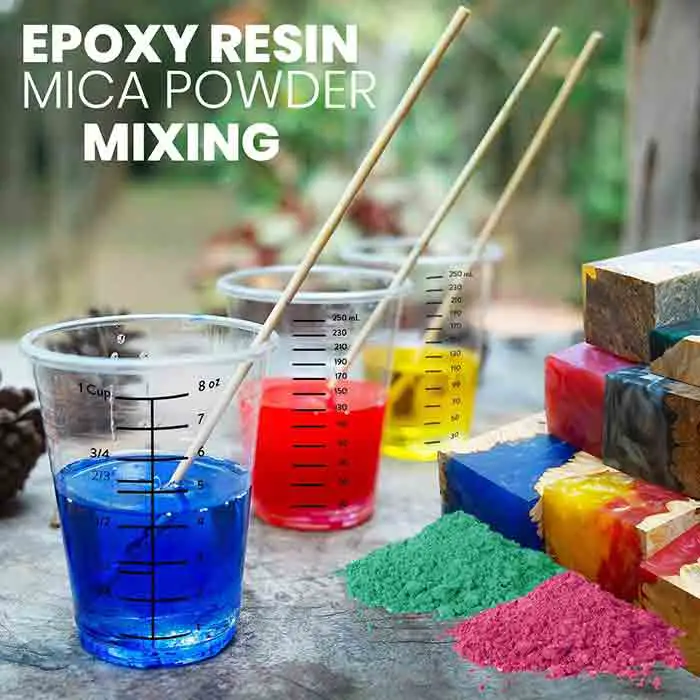
Step 2: Measure Resin and Hardener

Based on the size and type of your coasters, measure the right equal amount of resin and hardener by volume. So, how much resin do I need for a coaster? Well, just for an idea, you’ll need approximately 3-4 ounces of epoxy resin to create one coaster. You’ll have to take resin in one cup and hardener into another by 1:1 proportion.
Step 3: Mix Them Well
Now, pour one into the other and mix them very well with the mixing sticks. Mix it carefully for about 3 minutes and try not to produce bubbles as much as possible. Although a high-quality resin will have degassing property that releases bubbles. You’ll have to scrape the sides and bottom of the cup very well. That’ll ensure there’s no stuck portion of resin and hardener is left. To create multiple layers of color effects, take the resin in different cups to add each of your expected colors.
Important Tip:
- Ensure a well-ventilated workplace for safety practice
- Put on hand gloves for safety
Step 4: Adding Color to Epoxy Resin
You can just add your favorite color to the mixture. If you’ve planned to use glitter, make sure you add them into the cup as well. For any sort of color experience, you’ll have to use the clear casting resin. On the other hand, to create galaxy resin coasters with a beautiful geode or agate abstract look, use black resin. Some of the most common colors that you can play around with are –
- Acrylic Pigment Color Inks
- Acrylic Paint Color
- Best Mica Powder for Resin
- Best Alcohol Ink For Resin
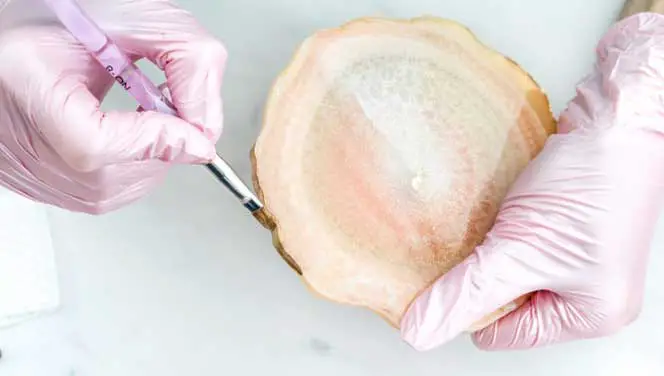
Step 5: Pour into the Mold
Hopefully, you’ve already planned how you’d like to decorate and shape your idea into the mold. Make sure that the coaster mold is clean and free from any kind of fingerprints or anything. Now, pour the resin inside the mold like a ring shape or, you might start by first pouring onto the center.
Starting by the center is the easiest way to apply most of the crafting effects like geode textures. Because then, the resin will spread around to the mold edge. The self-leveling property helps it to level properly. If not, you might use a craft spatula to spread the first coat.
Important Tip:
- Use a heat gun if necessary to eliminate bubbles
- You can always use an art resin torch for the same purpose
- Don’t overhead the surface, just do what you need
Step 6: Let it Cure
Now, cover your coasters with a clean cloth or something to prevent external dust and keep them in a safe place. You should allow about 24 hours (or more depending on the situation) to let it dry fully before you unmold it. Molds that are made with silicone won’t be sticky to the resin. Also, you might use a resin mold release product to extend its longevity.
Step 7: Polish Your Coasters
The final step! Cured resin will come out rock-solid and sturdy with a neat surface finish. But, in case if you need it, you might use fine-grit sandpaper or a high-quality resin polish. That way, you can achieve a better finish and excellent outlook. Hence you might use a sanding block as you’ll just be holding the coaster in hand.
Here are 10 Creative Resin Coaster Design Ideas
Creating professional and beautiful resin coasters is at your fingertip. But, only when you know about the particular design and how to do that exactly. And, to make your way easier, it’s time to explore some of the popular coaster design ideas you can try out!
- 3D color effects using alcohol ink
- Galaxy resin coasters effect with black resin
- Adding glittering effect with gliding flakes
- Geode/agate resin coasters design
- Crafting with flowers and leafs
- Modern transparent design
- Color splash wave pattern
- Glow or fire flame effects
- Cloud pattern on coasters
- Petri dish color effect
What Are Resin Coasters Used For?
Resin coasters are beautiful items where you can put your drinks on. Boasting resin craft, they look very pretty and play a great role in increasing the elegancy of your tables.
Beauty isn’t the only good thing about resin coasters. They are often impressively durable. So, they are capable of protecting the surface of a table from hot or cold glasses and bottles of drinks. They will prevent the heat from damaging your furniture or keep the moisture away.
In addition to that, leaving the drinks on the coasters can be used to sign that the drinks aren’t finished yet, usually in coffee shops.
Other Uses of Epoxy Resin
When it cures, it forms a sturdy and durable stage. It’s also a kind of surface sealer except for silicone as it doesn’t stick well to that. So, here’s a full list of things you can do using epoxy resin.
- Tumblers making
- Countertops coating
- DIY or, homemade floors
- Prevent shedding & peeling
- Sealing loose surfaces & glitter
- Tabletops like river-table
- Creating mosaic
Health Risks of Using Epoxy Resin
Resin, at the liquid state, might be a skin and eye irritant. It’s also toxic to organisms that live in the water like nekton, plankton or, benthos. But, when cured with the hardener, it’s safer and no more hazardous. That’s the reason people are advised to wear gloves when working with them.
Now, on the other part, some hardeners are corrosive and toxic and have specified applications. It’s because they’re eligible for some specific health impacts.
So, if you’re working with this particular component for a long time, without using proper safety equipment, you might suffer from an allergic impact in the long run. Often, your hands are the victims. Therefore, hand protective gears are very essential when making coasters with epoxy resins.
One thing you must note is that high-quality epoxy resins with a high molecular weight of diluents are well worth in this case.
That’s why your choice matters when health safety is an important concern.
Conclusion
So, that’s it for today on how to make coasters using epoxy resins. We hope that you’ll now be able to bring your ideas into a nice and attractive visual look. Try out the different texture and pattern effects as you wish and feel free to advise and suggest to us what worked better for you and what not!
Thanks and have a good day!
Note – All our comprehensive tutorials are in-depth internet research based where we try to help you sort out the difficulties. We certainly acknowledge the validity and authenticity of the information. Subject matter experts are highly welcome for their valuable suggestions.