Although caulking is a common maintenance task, it requires some skills. Otherwise, it can turn into a real mess, especially if you don’t know how to smooth it out. That’s why you should consider using caulk finishing tools.
It will give you a more appealing appearance than using your fingers.
Moreover, the tool will deliver a more uniform and effective airtight seal around water prone say, shower surroundings. However, smooth bead finishing requires a basic understanding of the type of tools and their specific uses.
Well, we’re here to help you with that! We’ll show you how to use various caulk finishing tools PROFESSINLAY…in the RIGHT WAY!!!
How to Use 3-in-1 Trowel and Scraper Tool
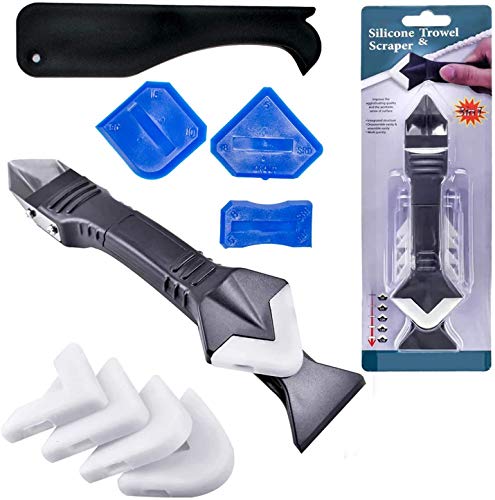
3-in-1 trowel and scraper is the ideal tool for seamless, professional caulking joints. Besides, this sealant smoother is intended to smooth out various types of seals. Thanks to its 3 corners which have different angles and shapes.
This will allow you to quickly and easily shape silicone in any type of application.
To smooth out the joint, start by cleaning the surface you’ll be working on. Let the surfaces dry and apply a strip of masking tape on both sides of the joint you intend to seal.
Now, apply the appropriate sealant with a caulking gun. Once the sealant is in place, it’s time to use the 3 in 1 trowel and scraper tool to shape the fresh sealant bead.

Choose the appropriate corner depending on the desired appearance and the seal’s function. Place the tool corner at the end of your seal and slowly move it at an angle.
Make sure the tool follows a straight path. Once you’re done finishing the sealant, remove the masking tape. This will leave you with a flawless and perfect seal.
How to Use Silicone Profiling Tool

It comes with various silicone sealant bead profiling tools. Some sets include accessories like; removal tools, caulk caps, nozzles, and scrapers.
Best of all, each one works on various materials, including caulk, grout, and resin.

Hence, to finish your silicone joint, simply apply the caulk to the desired joint. Then choose the appropriate profile for your application. Place the tool at the beginning of the bead and hold it at an angle. Make sure it’s pointing towards the direction of travel.
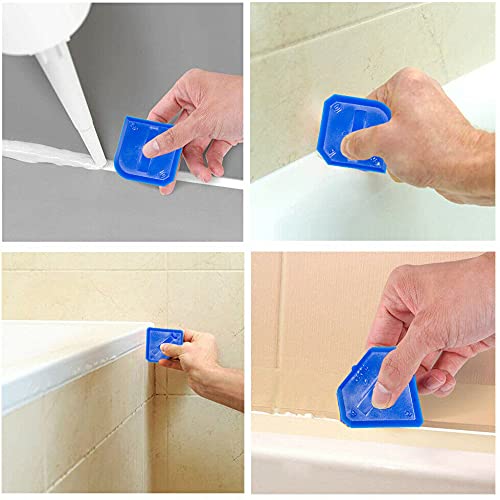
Next, press down firmly and move it at an even rate to achieve an excellent finish. Use a dry cloth to wipe off excess sealant from your tool immediately after use.
How to Use Caulk Bead Finishing Tool
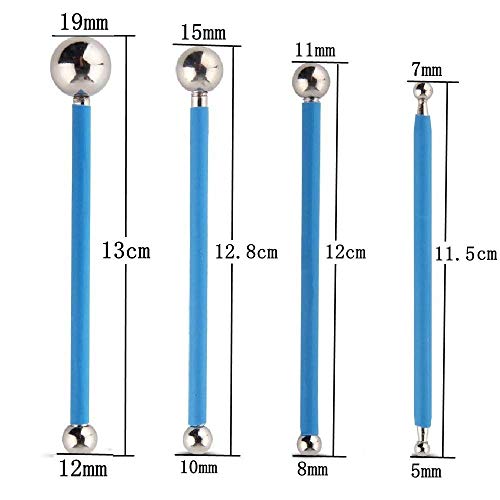
Available in a set of 4 smoother tools, metal balls are incredible in finishing caulk beads. They create perfect edge details in sink or molds regardless of the direction you hold them.
Moreover, they ensure that you get the same radius on horizontal and vertical corners.

Once you put a fresh new bead, run the corresponding finisher tool over the sealant in any direction. This will always create a perfect caulk bead.
Unlike others, metal balls don’t wear down over time. For that reason, it’ll never create lines and ridges in the caulk radius.
Types of Caulk Finishing Tools
These tools are usually made of stainless steel, rubber, or plastic. Regardless of the material, they have enough flexibility to glide over the new bead. More importantly, it should smooth down a bead, instead of leaving a mess.
Most stainless steel tools will have a wooden handle. This provides a comfortable grip as you drag the blade across the sealant. Besides, the stainless steel construction extends its longevity since it’s rust-resistant.
Rubber and plastic kits have arrowhead- or tongue-shaped tips or heads. You just simply hold them and drag their head along the sealant bead.
Why Use a Tool for Finishing Silicone?
You can use various techniques to finish your caulk bead. For instance, you can smooth out the joint with your index finger. However, a finishing tool is essential since it provides a smoother and more even bead.
Moreover, it’ll trim away excess sealant while forcing the rest down the joint/ crack.
You’ll be able to achieve a professional outcome when for example, re-caulking your shower. Not to forget that it’s extremely simple to use, even for starters.
Also, these tools are water and rust-resistant. For that, they’ll not leave stains on the surface you’re working on. Lastly, they’re safe to use, thanks to the protective covers that protect you from their sharp edges.
Conclusion
Knowing how to use a caulk finishing tool will help you create an invisible sealant line. Also, this will allow you to press the caulk uniformly into the joints. As a result, your job will look more professional.
Even better, you’ll get a watertight seal, thus ensuring the joints are 100% waterproof. All you need is to follow the steps depending on the tool you’re using.