Caulking the shower surrounds and bathtub area shouldn’t be that complicated with the right tools. And, you’ll just have to follow the right procedure. That’s what you’re going to learn today in this tutorial. This will be a comprehensive shower caulking guide with an actionable step-by-step procedure even a novice can follow!
You’ll see a list of essential items you’ll have to keep at your disposal to caulk the shower like a pro. You’ll also learn about the do’s and don’ts and hopefully everything you need to know about this particular how-to job! So, let’s get started!
You may also like to read:
Caulking a Shower Surround and Bathtub Area
Following today’s tutorial, you’ll see how easy it is to achieve a durable sealant profile even on those quite tricky and transverse joint areas. An important thing is that you should set a time to do this when the shower is not in use. This will give you ample time to cure and let the caulk dry completely.
Essential tools you need to have:
- Liquid caulk remover/softener
- Sealant scraper/removal tool
- Shower silicone sealant
- Caulking gun
- Finishing tool
- Bead smoother tool
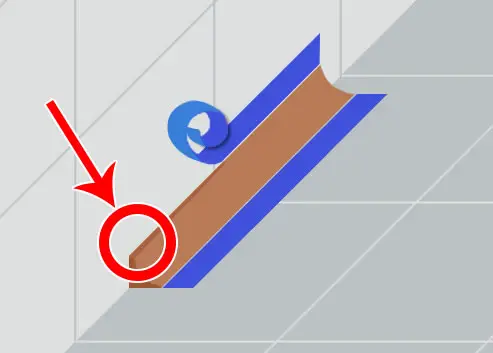
1. Removing Old Sealant
The very first step is to prepare the surface, which will make the process easier. If the surface is already caulked, you’ll first need to remove the old sealant. Also, ensure it’s free of dirt, mold, and mildew. Otherwise, the silicone will not adhere as it needs to and you’ll have to redo it after a while.
2. Clean Up the Surface
Remove any harmful funguses around your shower caulking area. You might use some kind of store brought mold-killing products. Or, you might use a homemade mixture of water, bleach, and laundry soap.
Then, take it into a spray bottle and spray it over the surface. Now, you just rinse the area with water to clean it properly and let it dry.
3. Fill Any Large Gaps
Before caulking, it’s very important to fill up any large gaps with backer rod gap filler foam. This will save your time and money as it reduces the use of your expensive caulk by filling up those large cracks and gaps.
4. Tape the Area
Taping doesn’t produce good results if you can’t handle it properly. As mentioned in our 5 Shower Caulking Tips section (below), there’s a bad impact you might face due to taping.
But, we’ll do this just to reduce the mess and it’s very effective for novices making a huge mess. Put the tape leaving at least 1/6 inch gap from the intended caulk bead area/thickness.
Your sealant smoother tool will scrape away the excess part so you won’t have to worry! So, taping that way would make the clean-up process a lot easier.
5. The Ideal Caulk
The biggest limitation for most homeowners could be to find the best caulk for shower. Assume that silicone is mostly used in water-prone areas. It’s because of being moisture resistant and durably waterproof.
And, it can be a bit of mindful when applying around the shower tiles, bathtub, drain, faucet, door frames, sinks, stalls, or splashes. Silicone-based sealants will stick longer and not fall off easily. Although it is not paintable in most cases, the durable seal they make is just awesome.
You’ll find many color options so you can match the surroundings even without painting. It is also advisable to ensure that the caulk is waterproof and one that can prevent funguses like mold or mildew.
At a glance, here’s a feature checklist for the sealant to have:
- It should be waterproof
- Flexible if the surrounding will have movement
- It should prevent the growth of funguses
- Durable and matching color with the surroundings
- Withstands cleaning products or, homemade recipes
6. Right Caulk Gun
You’ll come across electric and manual caulk guns available. And you may choose the best match according to your preference. Almost all guns serve the same purpose. Remember that one may use the sealant tube free-hand without the help of a caulk gun.
But, we don’t recommend this, especially if you’re a beginner. So, a professional-grade caulking gun will always come in handy!
7. Cut the Nozzle to 90 Degrees
We’d suggest you cut the caulk nozzle to 90 degrees rather than cutting at 45 degrees. One of the great advantages is that you can put much pressure against the joints and your profiling gets a lot easier. Also, the nozzle tip size should be the same diameter as the sealant profiling tool you’re using.
So, you can easily shape the bead compatibly without making too much wastage.
8. Start Caulking
Now, it’s time to get down to action! Start from one side and create long beads as you move to the other side. Press the caulking gun trigger constantly along the way to create a bump-free sealant profile.
You should press the nozzle against the corner a little bit to ensure you’re not creating any unnecessary gaps. This is not a big deal to worry about as the smoother tool will later handle the joint profile.
9. Shape the Caulk and Profile
With your sealant profiling tool, scrape the bead and tighten it against the corner. That way, you can scrap the excess caulk and create a durable joint profile.
5 Shower Caulking Tips for Professional Finishing
DIY caulking thoughts are completely different compared to when you become a professional. Some people might recommend you some steps that aren’t yet necessary to get the job done faster keeping future safety in concern. That’s why we’ve laid this special TIPS section for you. And, hopefully, you can avoid those silly common mistakes. Keep following and you should understand why!
1. Avoid Taping or, Do it Carefully
While taping can help you achieve a straight sealant bead, it doesn’t really help when you apply it very close to the joint. It rather creates an unleveled caulk-bead-edge like a step. You’ll be able to see that when you peel off the tape.
So, on that step, water doesn’t run down and creates a place for bacteria. Following that, mildew, dirt, and soap scum will accumulate over time. That leads you to another cleaning or re-caulking process which is time taking.
But, if you’re confined to use tape and have seen people are achieving better results; make sure you put it at least 1/6 inches (or more) away from the joint. That way, you can control the mess and get a nice caulking bead.
2. Don’t Finish Using Your Finger
You might have been advised to use your finger as an alternative to caulk finishing tools. While this might seem to be an easy option, but this is not good, both for your hands and for the surface to achieve a good sealant joint profile.
First, your hands will leave bacteria on the surface. That will eventually empower the growth of harmful mold and mildew. Besides, if you press too much, the bead will be very thin and almost non-existent.
3. Don’t Create a Thin Concave Profile
Another adjacent problem of using your finger is that when you’re pressing the caulk hard against the joint, it will create a very thin concave profile. And, it will get scratched or washed when you start cleaning the mold shortly. So, it’s weaker than a thick diagonal joint bead.
4. Don’t Pull the Caulking Gun Gently
But, if you’re just running it along the joint without forcing, it will create gaps between the wall and the sealant. Later, you’ll have a hard time achieving a tight seal. You should pull the gun tightly against the wall. That’s the first step of a sturdy sealing process. Afterward, using a caulk finishing tool will help to achieve the bead stronger.
5. Don’t Use a Bad Surface Cleaner
Bad surface cleaners like water and detergent will apparently make the surface slippery. Following that, if you don’t remove that coat, you won’t be able to let the silicon stick to the surface. Hence, a commercial liquid caulk remover solvent would work best!
Conclusion
There you have it; we’ve shared a very useful guide on how you can caulk your shower surround and bathtub area like a pro. This includes areas like your shower door frame, tiles, drain, faucet, bathtub surrounds, etc. However, it’s not a one-time task. You will need to re-caulk as part of the annual maintenance process.
To enhance the effectiveness of the bathroom sealant, the old bead should be removed anytime a new layer is being applied. That way, you can also restore the glory of your 3 piece shower bathroom. And, it is something that you can actually do, without any professional help.
FAQs
1. Does Caulk Scraper Tools Scratch My Acrylic Shower Tray Or Tub?
Answer: If you’re using a sharp edge razor scraper, then it might damage the surface somehow. Other than that, if you’ve got a plastic yet durable sealant removal tool, you’re safe!
2. Can You Caulk Over Old Caulk?
Answer: It’s a good practice to remove the old sealant layer before applying fresh caulk. But, that’s not always mandatory. You might clean and degrease the old sealant bead with a good caulk cleaner product.
Or, you might also degrease the surface using acetone or methylated spirits. They’re quite strong yet less abrasive on the surface. Then you can apply the new silicone over the old one and to both uncaulked sides of the old bead.
Hence, the sealant layer gets unnecessarily a bit thicker. And, if the old sealant layer has any crack or detached from the surface, it might be a hard job to achieve a better seal with the new sealant layer on it.
3. Should You Caulk the Inside of a Shower Enclosure?
Answer: Yes, it’s really important to caulk a shower enclosure. This will prevent your glass shower enclosure from leaking problems and install it properly in place. The vertical inside corners and tiled wall joints with the enclosure needs to be caulked.
And, on the outside, the horizontal shower tray and enclosure meet-up point should also be sealed with silicone caulk.