 Epoxy resin is one of the most popular and useful products for DIY art projects. It has incredible adhesive properties and it’s extremely versatile. For that, you can use it on various materials, including plastic, wood, and metal.
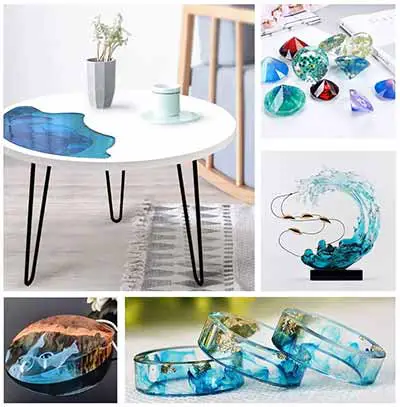
If you know how to use epoxy resin for crafts, it’s easy to achieve a beautiful and glassy finish.
Unfortunately, using epoxy can be very intimidating, especially for beginners. That should not worry you though! In this article, we’ll share with you how you can use it like a pro. With these tips, using epoxy will be one of the easiest tasks to do.
Epoxy Resin Working Time and Curing Time
Using epoxy is a quite simple process. Nonetheless, there are simple precautions you need to take to ensure the safe use of the product. For instance, you should always have proper hand protection when handling epoxy.
More importantly, you need to understand that epoxy dries rather quickly. For this reason, it’s good to mix the resin and hardener in small batches. In other words, always mix as much hardener and resin as you’ll use in 10 – 30 minutes.
This duration is referred to as working time/ pot time or gel time. Observing working time ensures that epoxy maintains adequate penetration and proper viscosity.
The curing time, on the other hand, refers to the duration taken by epoxy to harden completely. In most cases, epoxy has a curing time of about 24 hours. However, this will vary depending on other factors like type and room temperature.
One thing you need to note though is that it’s only about 95% of the full cure after 24 hours. To get the 100% full cure, you’ll need another 48 hours, giving you a total of 72 hours.
Supplies Needed when Using Epoxy Products
Epoxy offers endless possibilities! You can use various molds to create multiple designs and embed different items. You can even mix it with different colors and pigments. In this case, the supplies you need will depend on what you’re working on.
However, there are some general supplies you, regardless of the project you’re working on. They include;
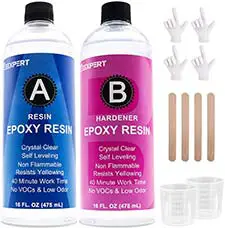
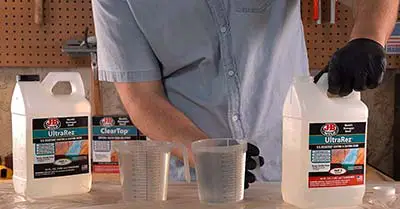
- Resin and hardener
- 2 Mixing bowl or cup
- Protection hand gloves
- Wood stirring sticks for mixing
- Resin color pigments
- Toothpicks
- Respirator mask
- Silicone mold
- Heat gun
If you’re overwhelmed seeing the so many supplies to pick from here and there, here’s what we’ve got! This is a Beginner Kit for any Resin Art Lover who’s about to start his/her first project right away –

![]()
General Preparation and Precautions
Epoxy is certified as harmless and non-toxic. Yet, it can cause problems like skin irritation. Therefore, you should handle this product with care. On top of that, there are some precautions you need to take before you use it, and these include;
1. Wear Protective Clothing
In its uncured form, epoxy can irritate your eyes, skin, and respiratory system. Moreover, it is very sticky and difficult to remove from skin and clothing. To protect yourself from these harmful effects, put on protective clothing.
This includes wearing hand gloves and protective clothing to cover your entire skin. Also, wear a pair of safety goggles for eye protection. Lastly, wear a respirator to avoid breathing in the fumes.
2. Clean the Work Area
As I stated earlier, epoxy adheres to most surfaces out there. Therefore, it’s important to cover your work area from any spillage that may occur during the project. You can use wax paper since epoxy doesn’t stick to it.
You also need to ensure that the surface you’re working on is free from dust and other pollutants. This is because dirt affects the feel, look, and effectiveness of epoxy. So, start by cleaning the surface with dish soap and warm water.
Let the surface dry completely before you apply epoxy to it.
3. Ensure Adequate Ventilation
Epoxy products produce low odor in their liquid state. This is an indication that they give off fumes. To protect yourself from these fumes, you need to consider room ventilation. Luckily, there are various things you can do to ensure the room has enough ventilation.
For instance, you can open windows, doors, and other openings. This will increase air movement in the workspace. If you’re unable to open the windows, turn on the ceiling fan. This will help to remove the produced fumes away from the workspace.
You can also install other fans like desktop fans to keep the air flowing.
4. Gather Your Supplies
Remember, the resin has a pot time of about 10 to 30 minutes. With such a short duration, time will get away from you very fast. Besides, this will make it very difficult to leave in between the task to get some items.
That’s why you need to gather all the supplies you’ll need before you start your project. I also suggest that you create a resin supply checklist to help you with that.
How to Use Epoxy Resin and Hardener
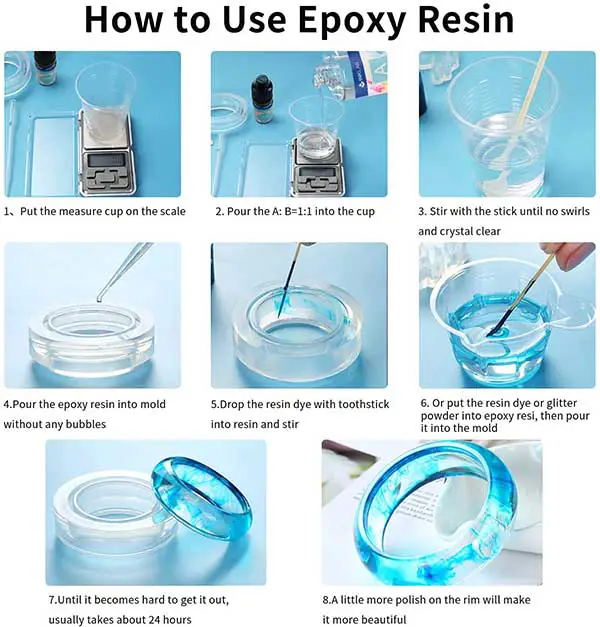
Epoxy is a 2-compound system that consists of hardener and resin. These components are kept separately. Therefore, to start using this product, you have to mix these parts together. This will trigger a chemical reaction, allowing the liquid resin to harden gradually.
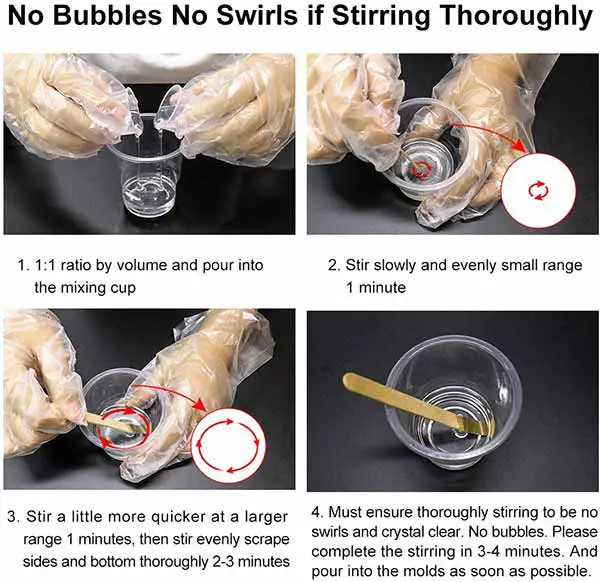
In most cases, the ratio of mixing hardener and resin is 1:1. However, you should read the manufacturer’s directions to be certain. Before you apply this product, mix the hardener and resin completely until it has a uniform color.
Apply the mixture immediately after mixing these components. Remember, the pot time begins the moment you mix the 2 substances. During pot time, you can still change or move parts of the surfaces you’re working with.
After that, you need to leave your creation for 24 -72 hours to reach maximum strength.
How to Use Epoxy Resin for Crafts
Resin is a fun and interesting product for doing various craft projects. It allows you to create beautiful and personalized pieces with ease. You can even use it to make customized gifts for your friends and loved ones.
It’s a great product to use on various crafts like coasters making. Besides, you can use it to cast charms or unique pendants. Better still, it enables you to embed your favorite inclusions. You can also add different colors to your pieces.
Before you use epoxy for your crafts, there are some fundamentals you should be familiar with. They include;
1. Measuring
The amount of resin you need for your project will depend on the type of craft you’re creating. To determine the exact of resin you need, use a measuring cup. Make sure the measuring tools are clean and dry.
Measure an equal amount of hardener and resin, and then pour them into the mixing cup.
2. Mixing
After pouring the resin and hardener into the cup, stir the mixture thoroughly for 3 minutes.
Remember to scrape the sides and bottom of the cup several times as you go. This ensures that no unmixed epoxy is left stuck to the bottom of the sides of the container. More importantly, it ensures that the entire mixture catalyzes.
3. Pouring
After mixing resin and hardener, you’ll have a working time of about 40 minutes. After that time period, the resin will start to harden and become too thick to spread. So, start pouring the resin mixture immediately after mixing.
Pour the mixture into the center of your enclosure or mold. The solution will automatically start to level. However, you can also use a spread to the solution to the edges.
If you’re pouring the mixture in layers, let the previous layer cure fully first. Also, let the mixture reach room temperature before you pour additional layers.
4. Adding Dyes/ Glitters
The best thing about working with epoxy is that you can incorporate any additive to your pieces. For instance, you can add a powdered pigment, glitter, or a liquid colorant.
Regardless of the additive you choose, don’t put more than 6% of the total volume of the resin mixture. Remember, adding more dye to your mixture will affect its curing time.
To add dyes, add a few drops of dye to your mixture. Stir the mixture well until you get a uniform color. For glitter, let the resin gel, then add glitter to the semi-cured solution. Leave your piece for a couple of hours to allow the new layer set.
After that, add more glitter and continue adding epoxy until the mold is full.
5. Pop-out Bubbles
After pouring epoxy, air bubbles will start to rise to the surface. The formation of these bubbles cannot be prevented. However, you can easily remove them from your mixture.
To achieve that, apply a hot gun or an art resin torch over the resin surface in quick motions. This will cause bubbles to rise to the surface and pop. Note, the heat source should be at least 10 cm away from the resin surface.
Otherwise, your pieces will start to turn yellow or boil.
For stubborn air bubbles, use a toothpick to pop them. You can use this approach to remove dust and hair. Nonetheless, the surface should still be in its liquid state.
6. Finishing
If your pieces have cured fully, you can go ahead and finish them. Here, you can use various finish tools like a hand block sander or 80- 120 grit sandpaper. Avoid using tools as they’ll remove too much resin.
Also, always wear a mask to protect yourself from the sanding dust. Afterward, use acetone and vacuum to clean the dust.
FAQs
1. Is it easy to use epoxy resin?
If you follow the right procedure, using epoxy is a very simple process. However, always remember to wear protective equipment when using it. Also, work in a space that has enough ventilation.
2. Can you use epoxy on a glass tabletop?
Over the years, epoxy has become a very popular product to use. That is because it’s durable and adheres to most surfaces out there including glass. So, yes, you can use it on glass tabletop and other glass projects.
3. What epoxy should you use?
There are various epoxies out there that you can use. The best product, however, will depend on your project needs. This is because different products available are intended for distinct purposes and applications.
4. Is epoxy stronger than plastic?
Epoxies are stronger than some plastic materials, but not all of them. This should not come as a surprise, seeing that they’re the strongest adhesives out there.
Their formula combines 2 components to form a strong bond with a tensile strength of about 5100 to 6000 psi.
5. Are epoxy resins paintable?
Yes. However, that will depend on the type of paint that you’re using, Acrylic paint is the best paint to use on epoxies.
6. Is epoxy dangerous?
Most epoxies are not dangerous after curing/ hardening. The problem lies when the adhesive is still in its liquid state, especially if it contains non-toxic chemicals. Also, some epoxies produce a strong odor which can also be dangerous.
So, always choose a food-grade certified resin.