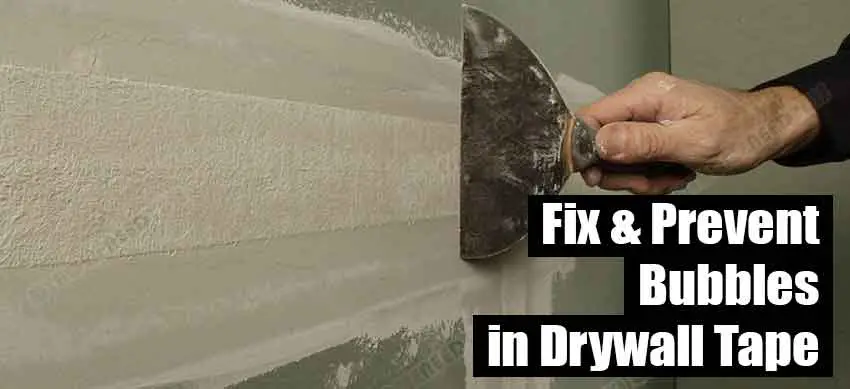
During the finishing phase, we often face some recurrent problems with drywall. One of the most prevalent issues is bubbles under the tape. You might have tried different methods to get rid of wall bubbling issues. But, here’s the standard way of how to fix and prevent bubbles in drywall tape.
The standard practice is to perform some repairing tasks with re-mudding the affected areas followed by sanding. Today’s tutorial will explain how to do that!
Specifically, you’ll learn the reasons behind fizz formation beneath the tapes. Also, learn how to prevent blister formation while renovating your drywall. Finally, if you have existing issues with pesky bubbles, this is the article for you! Let’s start by first understating the reasons behind its formation.
What Causes Bubble In Drywall Tape?
Before going to the burning issues of curing the bubbles, we need to understand why this happens. So, what are the reasons for sheetrock tape bubbles?
Basically, it happens with a painted surface.
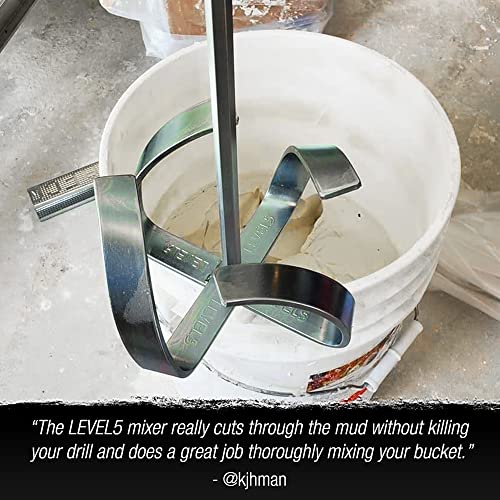
It doesn’t happen when you coat fresh drywall. When you spin the mixer and mix the mud, there’s always a bit of porosity. When you coat with that, fresh drywall can suck in those air chambers, because of being porous.
Thereupon, you get blister-free coats after just a few passes. But, on the other hand, painted sheetrock is kind of sealed. There’s no chance it’s going to suck in the air in your mud. That’s why you see it pops up as fizzes on the surface.
So, simply, it happens because of poor installation. And the excessive amount of joint compound tussled beneath the tape. There are a few more reasons though;
- The first issue is the uneven surface area of drywall. A smooth and flat surface is a prerequisite of having a bump-free tape joint finishing.
- Using a sheetrock mud that’s too dry and not runny as it needs to be. So, avoid using crusty and less runny mud. Otherwise, when the wall sucks in the moisture, you’ll have a hard time fixing it to prevent blisters.
- Too hard Scrapping of the adhesives. It can potentially cause the tape to uplift a bit. And when the moisture is absorbed by the wall, it forms air bubbles.
- The uneven layering of adhesive may lead to some fizzes. It’s like leaving voids and applying the mud poorly. It might then lead to some blisters formation.
- Lastly, if the pre-mixed joint composite’s quality is compromised, you might face many more issues than just air bubbles. So, here’s a quick little tip; always buy new composites if you’re not confident with your old ones.
Next time, when you start mudding and taping the wall, be sure you have cross-checked these issues. This will make the process a lot easier for you.
How to Prevent Bubbles in Drywall Tape: (8 Things to Consider)
We have already discussed the primary reasons behind the bubbling issues. But, is there any way you can prevent it? YES, we can take some necessary steps to prevent bubbles in drywall tape. One of the significant ways is to ensure proper blending of the compound with ground solids. Let’s see a few important considerations you can hook up with:
- DO NOT buy defected, frozen pre-mixed compound.
- The joint compound is a super-quality hygroscopic adhesive. So, while mixing it with solids or base materials, ensure a homogenous mixture is attained before applying it onto the wall surface.
- Check out the consistency of mud before applying. After mixing, the compound should look like cake icing and gently fall out from the mixing tub. It should be neither too runny nor too crusty.
- DO NOT apply mud on a moist wall. Moisture and uneven wall surface are major causal agents for bubbling. To prevent fizzes beneath the tape, ensure a smooth and moisture-free wall surface.
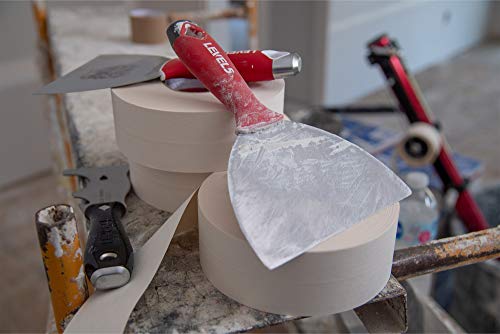
- Using the right drywall accessories is one of the prerequisites of attaining fizz-free tape joints. Use a wide flexible knife of about 5 inches to get maximum finishing. Or, you might also use a trowel if you have it at your disposal.
- Avoid poor application of the mud layer. Always try to put a quarter inches thick layer on the surface. Not too much and not too little.
- Take special care of the corners of the tape and seal it properly with mud to avoid any unnecessary tear.
- Try to use fiberglass mesh tape. It can easily prevent blisters and bubbles.
How to Fix Bubbles in Drywall Tape: (5 Practical Steps)
As of now, you already know the reasons behind fizzes and how to prevent them from happening. But, what if you are so unlucky that you see bubbles underneath the tapes and there’s no alternative but to fix them?
We will now explain how to fix those fizz formations and build a sustainable wall. First, check out the things you’ll need to repair the water bubbles in drywall tape:
Now, follow the steps to get rid of annoying fizzes from your beautiful drywall.
Step 1: Mark the Spots
Firstly, mark down the bubbling area under the tape. This step is very important because, most of the time, we overlook little fizzes.
Especially, look for the corner areas because these portions are incredibly prone to lift. It is better to mark these areas with a pen or pencil, which will aid your repairing process.
Step 2: Remove Small Area Bubbles
Identify different bubble structures. If you see a small little bubble or tape lift-up in the middle, cut these through. Press with the utility knife to unleash air from the bubbles. Now, apply mud over it and smear along both sides of the tape.
Make a smooth layer by passing the knife a few times.
Now, in case of bigger bubbles and many gathering in a close area, you need to remove the old tape at that point. Hence, cut into a circle including all those fizzes, and take that cap out. After removing the tape, just re-mud it carefully.
This is mostly advisable for an area of about 1 – 2 inches in diameter.
Step 3: Remove Bubbles in Wide Area
Now, what if the bubbling area is more than that of 1 inch? And it’s kind of popping up all around? Then it’s time to cut off and install new tapes in those places.
Application Procedure:
- Cut the tapes from the start and ending point of the bubbles
- Remove the existing mud if doable
- Re-apply mud consistently & spread it wider than the tape flanges
- Cut off a piece of tape measuring the length to fit that space
- Then carefully install it in place
- Scrape away the adhesive by pressing the knife evenly
- Give it a few passes but not too hard squeezing
So, that way you can embed the tape in and eliminate any fizzes. And you should now see the layer is about 1/16th of an inch. It works great for a messing area of about a maximum of 1 – 2 feet. And that becomes an easy fix.
You just remove that portion and re-mud it to install new tapes. But, if you see fizzes all along the tape joints that you won’t tolerate anyway, you must remove the entire line and start again. Otherwise, you might have to suffer after you finish painting the wall.
Step 4: Apply Finishing Coats
After the application area dries, check if that’s what you’re happy with. Then, it’s time to apply the second coat. This coat will go over the tape. Put smooth pressure on the tape to fix with the mud and spread it evenly on the surface.

In the zones where screw spots and nails are prevalent, apply extra mud, and smear it to cover it up. The corner bead portion of the walls should be mudded as well.
Lastly, you might apply another thin coat to the taped area. This coat might be six inches wide. And that leaves the wall to become more flatten.
Step 5: Sanding and Finishing
After all the mud has been dried, now it’s time to sand. Take safety measures by putting on a mask and goggles for dust-free sanding. Start with 120-grit sandpaper, or coarser than that if you feel it’s necessary.
The key point of this step is putting much pressure. Take special care where there are seams and screws spots. It’s always good to finish up any leftover patch repairs before sanding. Once done, you can apply primer thoroughly and it’ll be ready for painting!
Conclusion
Fixing the drywall tape water bubbles is now under your grasp. Hopefully, this comprehensive guide will enhance your skills in this particular action.
And we’d be grateful if you come back to us in a quest of gathering more knowledge and skills of repairing or fixing drywall-related issues.
Thanks so much and stay safe.
Note – All our comprehensive tutorials are in-depth internet research based where we try to help you sort out the difficulties. We certainly acknowledge the validity and authenticity of the information. Subject matter experts are highly welcome for their valuable suggestions.