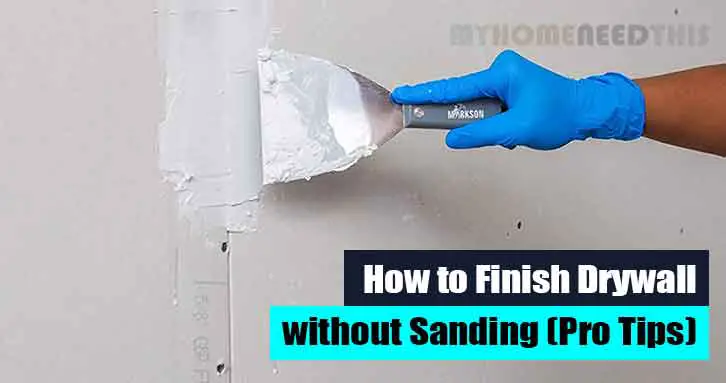
Sanding helps in achieving a smooth finish on the surface. Nonetheless, it can be a messy task. For this reason, you can opt to finish the drywall surface without sanding. By using a knife or rubber float, smooth down the surface until it appears like it has been sanded.
But, getting the job done properly, takes time.
This process involves taping the joints over, applying joint compounds, and smoothing out the surface. In this article, we’ll see the complete process with the benefits and downsides of finishing drywall without using sandpapers.
5 Steps to Finish Drywall without Sanding
The main benefit of this process is that you can reduce the dust. Although it requires time to get the job done properly, it’s effective in smoothing down the wall surface. Now, let’s get into the process involved in finishing gypsum board or, plaster walls without sanding;
Step 1: Prepare Drywall Sheets
Before mixing and applying the joint compound, first prepare the surface. Sheetrock Seams should match flatten each next to it. Then apply tape to cover the drywall seams, cracks, and nail holes. For the corners, you might choose to install corner beads. Start by applying the tape from the top of the seam and proceed till you reach the bottom. Press gently with the knife as you move down. This eliminates air bubbles under the tape to ensure it’s smooth and properly embedded.
Step 2: Mix the Joint Compound
Follow the manufacturer’s instructions when mixing the mud. This process can take about 15- 25 minutes. You need to be very conscious at this point. It’s impossible to soften the adhesive compound once it becomes hard. If you add more water, the mixture weakens, thus preventing it from sticking to the gypsum board wall.
Step 3: Spread the Joint Compound
Use a drywall knife to spread a thin mud layer over the taped seams, corners, cracks, and holes. Ensure the compound covers the tape and extends 2” beyond both sides of the tape. The same case applies to the corner bead parts. Indeed, you should be more careful with those vulnerable crack-prone edge trims.
Step 4: Leave the Compound to Harden
Leave the first coat for about 8 to 24 hours on the surface to harden. This mainly depends on the level of air moisture. When the compound hardens, dampen the surface with little water spray. This helps the second coat to adhere smoothly to the surface.
Step 5: Glide the Wall
Wet down a 10 –inch knife/ rubber float. Use it to glide its edge across the joint compound’s top. Hold the rubber float or knife at an angle of 90 degrees. Make sure that only the knife’s trailing edge touches the adhesive compound. While pulling the knife up or down in a single continuous stroke, apply pressure on it. Continue striking across the patched surfaces until it becomes smooth.
And, there you go!
It’s really practical and can’t be visualized 100% without putting your hands on the work. But, that’s basically how you accomplish the task professionally. We hope you might also be interested to read more about our drywall Patching Kit reviews.
Importance of No-Sand Gypsum Board Finishing
Is that even possible to smooth out the mud layer without the help of sanding? Some people might wonder why they should even try that! The truth is that it has both some benefits as well as limitations. First, this process is more suitable for those with sanding restrictions.
As stated earlier, sanding the wallboard is a messy task since it produces dust.
And, we know that drywall muds are made using several ingredients like silica, calcite, gypsum, etc. Some of these ingredients have been linked with varying levels of nose, respiratory tract, eyes, and throat irritation.
Over time, breathing the dust might cause persistent coughing, airway and throat irritation, breathing difficulties, and phlegm production. Even worse, if silica is present, you may be facing an increased risk of lung cancer and silicosis. Therefore, finishing the wallboard without sanding would help you avoid most of these problems.
Benefits:
- Cost-effective
- Doesn’t require complicated tools & procedures
- Reduces wallboard dust almost 100%
- Ideal for small projects
- Saves your time
Limitations:
- Doesn’t guarantee accuracy and perfection
Instances of No-Sand Wallboard Finishing
There’re various circumstances where finishing wallboard without sanding would be appropriate and cost-effective. Such circumstances might include;
1. Garages
Garage and workshop spaces are rarely seen. So why would one want to sand such spaces? However, this may be a matter of personal preference. For instance, some people might prefer a smooth and clean workspace like other residential areas. In contrast, some people may not be concerned with the appearance of their workspace or garage.
2. Cabinet-hidden Areas
Kitchens are mostly blanketed with appliances and cabinets. Therefore, you don’t have to finish such areas by sanding since they’ll not be seen anyway.
3. No Sanding Options
For those homeowner DIY small projects, this is the best technique overall. More specifically, if you’re prone to nose, respiratory tract, eye, and throat irritation, you must not try out sanding especially when you don’t have the essential PPE’s. At that point, just ignore and follow what we’ve discussed in the steps above.
Conclusion
During the finishing phase, skipping to sand will help to control drywall dust effectively. It’s the process of smoothing out the joints in the wall panels and preparing them for painting.
Having gone through this article, we’re certain you’ve got the most out of it. You’re now aware of the merits and demerits of finishing the wallboard with no sanding. Just remember that it requires finesse and patience. Besides, you achieve it without even any need for complicated heavy tools.
FAQs
1. How do you hide drywall seams?
The best way to hide the wallboard seams is by tapering them and applying a coat of mud. If they’re slightly indented, fill them with several other coats until they’re leveled with the rest of the part of the surface.
2. How many coats of drywall mud do I need?
Apply about 3 coats or more of a very thin mud compound instead of applying 1 or 2 heavier coats. Although the compound takes time to dry, don’t rush the taping process by applying thicker and fewer coats.
3. Do I need to tape drywall joints?
Yes! Every seam joint should have tapes embedded in the mud layer. This tape helps in strengthening the joint while the mud holds that tape in place.
4. Can you use caulking instead of drywall mud?
No! Although caulk looks good for a short period, it does not bond to the edges of gypsum panels and it eventually cracks loose. Another reason could be that caulks are more indented for non-porous surfaces like shower tiles, tub, glasses, etc.
5. Does drywall need to be painted?
After you’ve finished hanging the wallboard sheets and finishing and taping all the seams, apply 2 paint coats. This gives the interior an excellent final appearance.
6. Does it matter hanging sheetrock ceiling or walls first?
If you are working on the walls and ceiling, ensure that you always begin with the ceiling. This helps the walls to support the edges. Otherwise, the ceiling sheets may crack and sag over time.
7. How soon can you paint after mudding sheetrock?
You should allow the mud compound to dry for about 24 hours before priming, sanding, and painting. This should also be the case between coats. However, the drying time may be affected by temperature and humidity levels.
Note – All our comprehensive tutorials are in-depth internet research based where we try to help you sort out the difficulties. We certainly acknowledge the validity and authenticity of the information. Subject matter experts are highly welcome for their valuable suggestions.